Category: Software

  • Freepascal & Lazarus on the RaspberryPi Zero

    Start with the Seed-Compiler from freepascal.org. The currently active Version is 3.0.4. You can compile a newer version using this one later on, but it’s not necessary (currently).

    The “official” guides to install FPC + Lazaurs on Linux (and therefore the Raspberry Pi) are in the Wiki, for Linux and the Raspberry Pi. However, as IDE and compiler ar getting bigger, a little extra settings are required.

    Download, Extract and install:

    wget ftp://freepascal.stack.nl/pub/mirrors/fpc/dist/3.0.4/arm-linux/fpc-3.0.4.arm-linux-eabihf-raspberry.tar
    tar -xf fpc-3.0.4.arm-linux-eabihf-raspberry.tar
    sudo ./fpc-3.0.4.arm-linux/install.sh

    Afterwards, you should have FreePascal available as text-mode, command line compiler:

    pi@raspberrypi:~/Download/fpc-3.0.4.arm-linux $ fpc
    Free Pascal Compiler version 3.0.4 [2017/10/11] for arm
    Copyright (c) 1993-2017 by Florian Klaempfl and others

    Now, download Lazarus. You might create a new directory for this, and you will probably need to install subversion, too:

    sudo apt-get install subversion
    svn co http://svn.freepascal.org/svn/lazarus/branches/fixes_1_8 fixes_1_8_5

    To compile Lazarus, a few lot of dependencies are required, on a fresh install of Raspbian it’s something like

    sudo apt-get install build-essential libgtk2.0-dev libgdk-pixbuf2.0-dev

    This little line pulls > 200MB to the Pi, which might take a while. Before we can start to compile the lot, we need to increase available swap-space on the pi. Otherwise, linking Lazarus 1.8 will fail on the Pi Zero at least.

    sudo su -c 'echo "CONF_SWAPSIZE=1024" > /etc/dphys-swapfile'
    sudo dphys-swapfile setup
    sudo dphys-swapfile swapon

    Then, building Lazarus is as simple as that (however, it might take 1 hour to complete….):

    make all
    sudo make install

    Sometimes, “make bigide” is recommended. It will almost certainly not work, and compile a lot of packages that you probably don’t need. You can then install Lazarus by invoking “sudo make install”, or start it using “startlazarus”.

    But: as we used the binary distribution of the compiler, Lazarus will not be able to find the compiler sources; specifically, those of the runtime library. You can probably ignore this; it’s better, however, to get those sources:

    wget ftp://freepascal.stack.nl/pub/mirrors/fpc/dist/3.0.4/source/fpc-3.0.4.source.tar.gz
    tar -xf fpc-3.0.4.source.tar.gz
    cd fpc-3.0.4
    sudo make fpc_sourceinstall

    You might want to delete the extracted directory before starting Lazarus, to prevent it from finding this directory while searching for the Freepascal sources. If it does not find the directory on it’s own, you can point it to “/usr/local/share/src/fpc-3.0.4/fpc”.
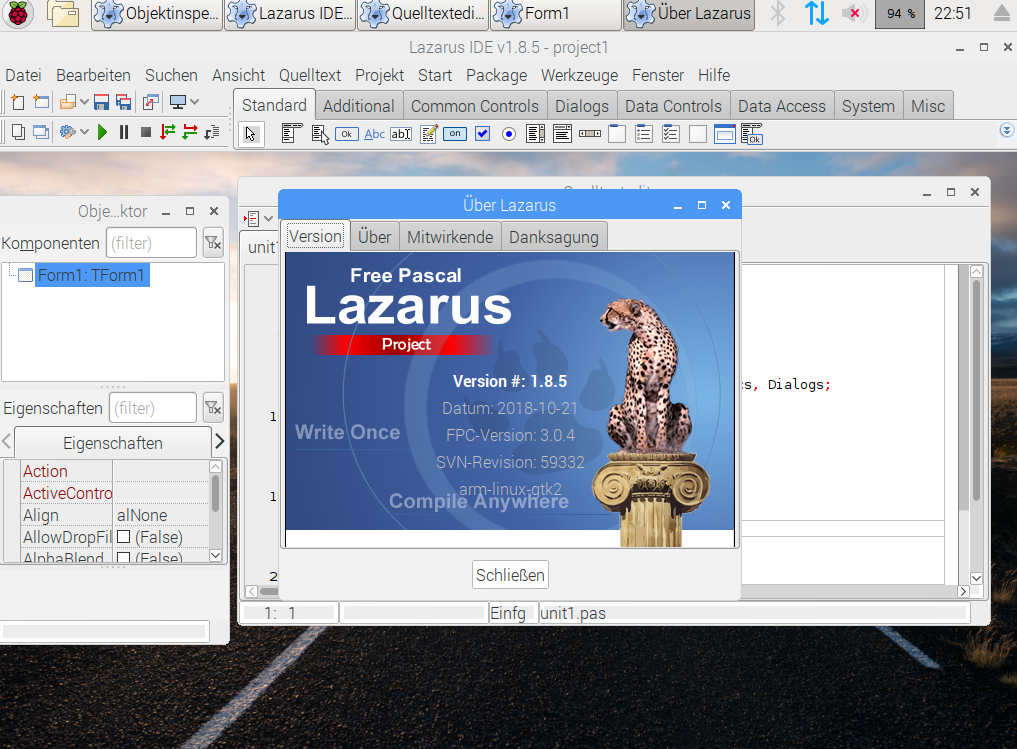
    Version 1.8.5 of Lazarus running in XRDP with the Raspbian Pixel desktop on a Raspberry Pi zero.

    Other variants:

    An older version of FPC and Lazarus is allways available in the standard packages of your system. Also, fpxdeluxe does a very goot job in pulling and installing FPC and Lazarus of any desired revision; however, the armhf6 Version required for the Raspberry Pi Zero (and A…) does not currently work.
  • OriginLab 2017 on Linux/Wine

    OriginLab does not officially support running their software on Linux/Wine, however, with a few tricks, it 95% usable – if you can live with 32bit only. The following is an a little more detailed description the AppDB entry on Wine HQ that I submitted recently, which is currently queued for publication.

    The following applies to the 32-Bit Pro version only, more specifically service release 2. 64 bit origin installs well, but crashes on startup; I didn’t investigate further, maybe it’s only a small bug…

    Setup

    As most people will probably already run a 64bit system, so you need to create a 32-bit wine prefix to continue.

    WINEPREFIX=$HOME/Apps/OriginLab WINEARCH='win32' wineboot

    After that, you should should use winetricks to install .NET Framework 2.0. In fact, it’s probably the wrong version to use, as Origin already expects Windows 7 – however, at the time of writing this, I did not succeed in installing any other .NET version in Wine. I’m not entirely sure what it is needed for, however, OriginLab refuses to export Graphs and Tables to Images without having it installed. To install it, it’s good to setup msxml3 manually beforehand, otherwise winetricks sometimes refuses to continue with .NET 2.0 installation. You will have to download msxml3 binaries manually anyway…

    WINEPREFIX=$HOME/Apps/OriginLab winetricks msxml3
    WINEPREFIX=$HOME/Apps/OriginLab winetricks dotnet20

    You may now set the reported Windows version to Windows 7 using winecfg

    WINEPREFIX=$HOME/Apps/OriginLab winecfg

    After that, some additional runtimes need to be replaced by the “original” versions. It is worth a try without them from time to time, Wine is gradually perfecting their build-in libs. At the moment, however, OriginLab crashes at least without CV runtime 2012 installed.

    WINEPREFIX=$HOME/Apps/OriginLab winetricks gdiplus vcrun2012

    You can then start the installer, e.g. by

    WINEPREFIX=$HOME/Apps/OriginLab wine $HOME/Downloads/Origin/setup.exe

    The setup might stall for a while at ~25%, but it will finish eventually.

    You can then start OriginLab 2017 and activate it with your license like on any other windows system. After creating your Workspace directory, you should however modify the newly created Origin.ini to disable the “Origin Navigator” dialog at startup. This dialog relies on MS Internet Explorer 9 and it’s HTML-Dialog feature, which is implemented in Wine, but with some features still missing. The dialog will be non functional, and cannot be deactivated from within OriginLab. Open the file and add the following two lines ad the very end:

    [ReminderMessages]
    20046=1

    This will disable the dialog for now. Note that Origin tends to store translated strings in different languages / encodings in that file, so if gedit / xed etc. refuse to open it, try the internal Wine notepad or GNU nano for example. This “hack” only disable the dialog startup, it does not “fix” any HTML based dialogs, those will need additional work on Wine Gecko…

    Working features…

    Working well as tested so far is

    • general data processing
    • ASCII import
    • OriginC scripting
    • Non-linear curve fitting
    • Digitizer / Data-Picker

    Working with some restrictions:

    • Image export (Vector-Graphics preview is not shown, export looks nice). You need to install .NET for this dialog
    • Python Scripting (works, but sometimes the runtime is not initialized correctly, leading to unrecognized functions and crashes)
    • 3D Plots work, were however not intensely tested
    • UI docking. The window titles of most of the tool windows are very narrow, docking is very picky about the positioning of the windows…
    • Printing; I could only test using “print to file”, some distortion did occur

    …and unusable things:

    • The 64-bit version of OriginLab. It crashes on startup…
    • Everything that requires some not yet implemented subset of MSHTML + JScript, so all Apps and features using the “HTML-Dialog” functionality. This includes the Welcome-Dialog unfortunately – it does not show any information and does also not hide. You need to modify the Origin.ini to get rid of it. As it relies on IE 9, setting the prefix to windows XP and installing IE8 does also not work.
    • Database Query Generator, probably also more of the database connection (the corresponding OCX-Controls do not work but crash).

    Not tested:

    • Image processing
    • Python or 3D support was only shortly tested
    • Matrices, I don’t need them
    • Signal processing
    • anything else…
  • Let’s Encrypt + Plesk

    Let’s encrypt issues SSL-Certificates for free – meanwhile most Systems trust their CA. Let’s Encrypt features a CLI to request, update and install certificates – which work’s nicely as long as your server’s setup is compatible. A Plesk based setup, however, is not.

    Luckily, Plesk features it’s own CLI – so let’s make a short script to renew and update certificates. Here’s the script, I’ll explain later. It requires Let’s Encrypt’s “certbot” to be installed in $HOME.

    #!/bin/sh
    
    IP="your.ip.v4.address"
    IP6="your:ip:v6:address"
    
    #Domains, format: domain.tld sub1.domain.tld sub2.domain.tld"
    Domains=("domain.tld sub1.domain.tld sub2.domain.tld" "domain2.tld2")
    #"Main" domain - the name of the certificate that will be associated to the IPs above...
    MainDomain="domain.tld"
    
    echo "Certificates will be renewed and installed in Plesk:"
    for dom in "${Domains[@]}"; do
      echo " $dom"
    done
    if [ -n "$1" ]; then
      echo "Renew will be issued for all, however only domain $1 will be updated in Plesk!"
    fi
    echo;
    echo " IPv4: $IP"
    echo " IPv6: $IP6"
    
    #"MonthName" should be something that is unique between subsequent calles of the script
    # date +%B should give the name of the current month, for more frequent calls use e.g.
    # date +%Y-%M-%d_%H-%m-%S
    MonthName="$(date +%Y-%m-%d_%H-%M-%S)"
    echo " Unique part for each certificate's name: $MonthName"
    
    echo;
    
    read -p "This might brake your setup. Type YES to continue: " Keypress
    
    if [ "$Keypress" != "YES" ]; then
      echo "I asked for \"YES\", you gave me \"$Keypress\". Exiting..." 
      exit 1
    fi
    
    echo;
    
    read -p "Call letsencrypt-auto ? [y/N] " Keypress
    
    if [ "$Keypress" = "y" ]; then
      ~/certbot/letsencrypt-auto renew
      echo;
      echo "Done."
    fi
    echo;
    
    function installcert {
      Certname="LetsEncrypt-Auto_($MonthName)_$1"
      echo;
      echo "Installing certifikate \"$Certname\" to domain repository..."
      key_file="/etc/letsencrypt/live/$1/privkey.pem"
      cert_file="/etc/letsencrypt/live/$1/cert.pem"
      cacert_file="/etc/letsencrypt/live/$1/fullchain.pem"
      /opt/psa/bin/certificate -c $Certname -domain $1 -key-file $key_file -cert-file $cert_file -cacert-file $cacert_file
    }
    
    function installcert_admin {
            Certname="LetsEncrypt-Auto_($MonthName)_admin_$1"
            echo;
            echo "Installing certifikate \"$Certname\" to admin's repository..."
            key_file="/etc/letsencrypt/live/$1/privkey.pem"
            cert_file="/etc/letsencrypt/live/$1/cert.pem"
            cacert_file="/etc/letsencrypt/live/$1/fullchain.pem"
            /opt/psa/bin/certificate -c $Certname -admin -key-file $key_file -cert-file $cert_file -cacert-file $cacert_file
    }
    
    
    function assigncert {
      Certname="LetsEncrypt-Auto_($MonthName)_$1"
      /opt/psa/bin/subscription -u $2 -certificate-name $Certname
    }
    
    read -p "Install certificates in Plesk? [y/N] " Keypress
    
    if [ "$Keypress" = "y" ]; then
      for domain in "${Domains[@]}"; do
        #Split into another array
        subs=($domain)
        main="${subs[0]}"
        echo "Working on domain $main..."
        #Domain $domain will only been updated if either no arguments are given, or the one and only argument matches $domain
        if ( [ "$1" == "$main" ] ) || ( [ -z "$1" ] ); then
          installcert "$main"
          #Then assign all certificates
          for sub in "${subs[@]}"; do
            assigncert "$main" "$sub"
          done
        else
          echo "==> Skipped."
        fi
      done
    
      echo;
      echo "Done."
      echo;
    fi
    
    read -p "Install & Assign SSL-Certificate of $MainDomain for IPs (Admin's repository)? [y/N] " Keypress
    
    if [ "$Keypress" = "y" ]; then
      installcert_admin "$MainDomain"
      /opt/psa/bin/certificate -ac "LetsEncrypt-Auto_($MonthName)_admin_$MainDomain" -admin -ip $IP
      /opt/psa/bin/certificate -ac "LetsEncrypt-Auto_($MonthName)_admin_$MainDomain" -admin -ip $IP6 
    fi
    
    function mailcert {
      Uhr="$(date +%Y-%m-%d_%H-%M-%S)"
      key_file="/etc/letsencrypt/live/$1/privkey.pem"
            cert_file="/etc/letsencrypt/live/$1/cert.pem"
            cacert_file="/etc/letsencrypt/live/$1/fullchain.pem"
            tar -chjf Cert-Backup-$Uhr.tar.bz2 /etc/postfix/postfix_default.pem /usr/share/imapd.pem /usr/share/pop3d.pem
            #Concat certificate for eMail...
      cat $key_file >/tmp/newcert.pem
      cat $cert_file >>/tmp/newcert.pem
      cat $cacert_file >>/tmp/newcert.pem
      cp /tmp/newcert.pem /etc/postfix/postfix_default.pem
      cp /tmp/newcert.pem /usr/share/imapd.pem
      cp /tmp/newcert.pem /usr/share/pop3d.pem
      chmod 400 /usr/share/imapd.pem
      chmod 400 /usr/share/pop3d.pem
      chmod 600 /etc/postfix/postfix_default.pem
      rm /tmp/newcert.pem
      /usr/local/psa/admin/sbin/mailmng --restart-service
    }
    
    read -p "Install certificate of $MainDomain to Postfix/IMAP/POP ? [y/N] "
    
    if [ "$Keypress" = "y" ]; then
      mailcert "$MainDomain"
    fi

    The script has a short configuration section at the top, most notably the domains you want to work on. They are give in a string array, containing the domain name given first when registering a certificate with LetsEncrypt as the first token, and all sub domains you want to secure with the same certificate separated with spaces. More precisely: Let’s encrypt stores your certificates into /etc/letsencrypt/live/<domain>, the first token is used to generate this path. I recommend using your domain without any subdomain for this purpose, i.e. “domain.tld sub.domain.tld sub2.domain.tld”. To achieve this, when calling lestencrypt-auto, give this domain as the first one, i.e.

    ./letsencrypt-auto certonly --webroot -w /var/www/httpdocs -d domain.tld -d sub.domain.tld

    This, of course, requires your domains to be set up in Plesk the same way, i.e. in Plesk, domains with the names “domain.tld”, “sub.domain.tld” and “sub2.domain.tld” must exist. The Plesk-CLI commands used to register and setup are:

    • /opt/psa/bin/certificate -c <certname> -domain <domaine> -key-file <key_file> -cert-file <cert_file> -cacert-file <cacert_file>
    • /opt/psa/bin/subscription -u <domain> -certificate-name <certname>

    If you want your IP-Adresses given a default certificate, you should set both IP-Adress variables AND the “main domain” setting. The script will look for a certificate issued for this domain, register it in the admin’s repositiry and the assign it to both addresses. The respective commands issued are:

    • /opt/psa/bin/certificate -c <certname> -admin -key-file <key_file> -cert-file <cert_file> -cacert-file <cacert_file>
    • /opt/psa/bin/certificate -ac <certname> -admin -ip <IP>

    If you want your email communication to be secured with your Lets Encrypt certificates, you have to request a certificate for your “main domain” that includes your MX subdomain. For example, if “main domain” is set to “example.com” and MX for this domain is “mail.example.com”, your certificate must include this subdomain. Securing a Plesk-based system’s email with your own SSL-Certificates has been described by Jay Versluis on wpguru.co.uk, and I simply scripted his approach.

  • Updating sparklines in OriginC

    Ever wondered how to tell OriginLab to update the sparklines after a custom import-filter (or whatever data-manipulating script) has been called?

    Well, you can call the “sparklines” X-Function. The documentation is, as usual for OriginC, not the best and calling X-Functions with the wrong parameter will simply crash OriginLab, but it’s worth it…

    Code:

    bool call_UpdateSparklines_XF(Worksheet &wks)
    {
        // Create an instance of XFBase using the X-Function name.
        XFBase xf("sparklines");
        if (!xf)
            return false;
     
        // Set the 'iw' argument. A worksheet for XFBase is referenced using a Pointer (not the name...)
        if (!xf.SetArg("iw", wks))
            return false;
     
        // Set the 'sel' argument.
        if (!xf.SetArg("sel", 0))
            return false;
     
        // Set the 'c1' argument, the first row to update. Counter starts at 1.
        if (!xf.SetArg("c1", 1))
            return false;
     
        // Set the 'sel' argument.
        if (!xf.SetArg("c2", wks.GetNumCols()))
            return false;
     
        // Call XFBase's 'Evaluate' method to execute the X-Function
        if (!xf.Evaluate())
            return false;
     
        return true;
    }

    You might also find this Forum-Entry useful, where some different possibilities are given: OriginC-Forum / Sparklines

  • HD TFT vs. VGA-KVM Switch – and Linux

    Multiple Computers at the same Keyboard, Video and Mouse – no problem when using a KVM Switch. Unfortunately, mine (DLink DKVM-2KU) does not seem to route the IDx-Pins of the VGA connector correctly, my system was not able to get the required EDID data to know which timings and resolutions are supported by the monitor.

    This resulted in a max. resolution of 1360×768 pixels – way below the native 1920×1080 (which I could easily set when connecting the display directly via DVI or VGA). Most guides to add additional resolutions suggest asking gtf or cvt to calculate the respective timings (where for TFT-Displays CVT-based timings should be used, see e.g. http://www.uruk.org/~erich/projects/cvt/) and pasting these to xrandr to set the required mode. However, this does not work if xrandr thinks the monitor cannot take the requested frequencies.

    A call to cvt may produce this:

    X@Y ~ $ cvt 1920 1080
    # 1920x1080 59.96 Hz (CVT 2.07M9) hsync: 67.16 kHz; pclk: 173.00 MHz
    Modeline "1920x1080_60.00"  173.00  1920 2048 2248 2576  1080 1083 1088 1120 -hsync +vsync
    

    The printed “modeline” contains all the timings needed for the card to drive the monitor at the requested resolution, however – in my case – adding the requested resolution resulted in an error, basically telling me that one of the parameters was not in a range supported by some device in the chain (DAC or Monitor for example):

    X@Y ~ $ xrandr --newmode "1920x1080_60.00"  172.80  1920 2040 2248 2576  1080 1081 1084 1118  -HSync +Vsync
    X@Y ~ $ xrandr --addmode VGA-0 "1920x1080_60.00"
    X Error of failed request:  BadMatch (invalid parameter attributes)
      Major opcode of failed request:  140 (RANDR)
      Minor opcode of failed request:  18 (RRAddOutputMode)
      Serial number of failed request:  29
      Current serial number in output stream:  30
    

    Most forum-threads, guides and Wiki-entires break at this point and say “Well, your monitor simply cannot do this”. Mine does, however the system doesn’t know. The source of the problem was in the X-Org config-file /usr/share/X11/xorg.conf.d/90-monitor.conf (in this case of Linux Mint 17.1, although I don’t know where this file came from – it doesn’t seem to be part of the standard system packages), which contained:

    Section "Monitor"
        Identifier     "Monitor0"
        VendorName     "Unknown"
        ModelName      "Unknown"
        HorizSync       30.0 - 63.0
        VertRefresh     55.0 - 75.0
        Option         "DPMS"
    EndSection
    

    When I2C and therefore EDID is working correctly, the file seems to get overruled by the information provided by the monitor – in my case, EDID didn’t get past the KVM switch. The modeline calculated by cvt stated a pixel-clock of 172.80 MHz, together with a total virtual display width of 2576 points. This results in a horizontal refresh-rate of 67 kHz – which is higher than the maximum of 63 kHz given in the file.

    Once I fixed this (I set it to 200, which is way to high, but doesn’t matter here…), xrandr accepted the mode. If you want this to be permanent, you might configure your X-Server according to this guide – but don’t forget to add the HorizSync and VertRefresh parameters!

    But, for haven’s sake, be careful! Setting really wrong values will at least leave you without a picture (or an “Out of Range” message) for TFT screens, CRTs might get damaged!

    Update: There’s annother error that I came accross when reinstalling the machine recently:

    X Error of failed request:  BadName (named color or font does not exist)

    This time, I simply had to change the name of the mode from “1920x1080_60.00” to “1080p” – problem solved. Possibly my Xsession-script did not fail completely and blocked the name for future use…

  • Agilent U1253A with LabView

    Agilent’s U-Series Multimeters have the ability to be talked to via an infrared interface (and some of them even feature an OLED display), either through Agilent Keysight’s slightly overpriced USB-To-IR Adapter, or by building your own. If you intent to follow the latter path, be sure to read Josip Medved’s Info about the Adapter; it covers pretty much everything you need. There’s also a YouTube-Video with a more sophisticated (and probably oversized) approach.

    LabView

    With the communication working (you might test it with Keysight’s own logging-tool), it’s probably more interesting to be able to control the device using LabView. Unfortunately, I could not find any libraries, and the documentation is limited to a post on Philipp Klaus’ blog describing the basic command set.

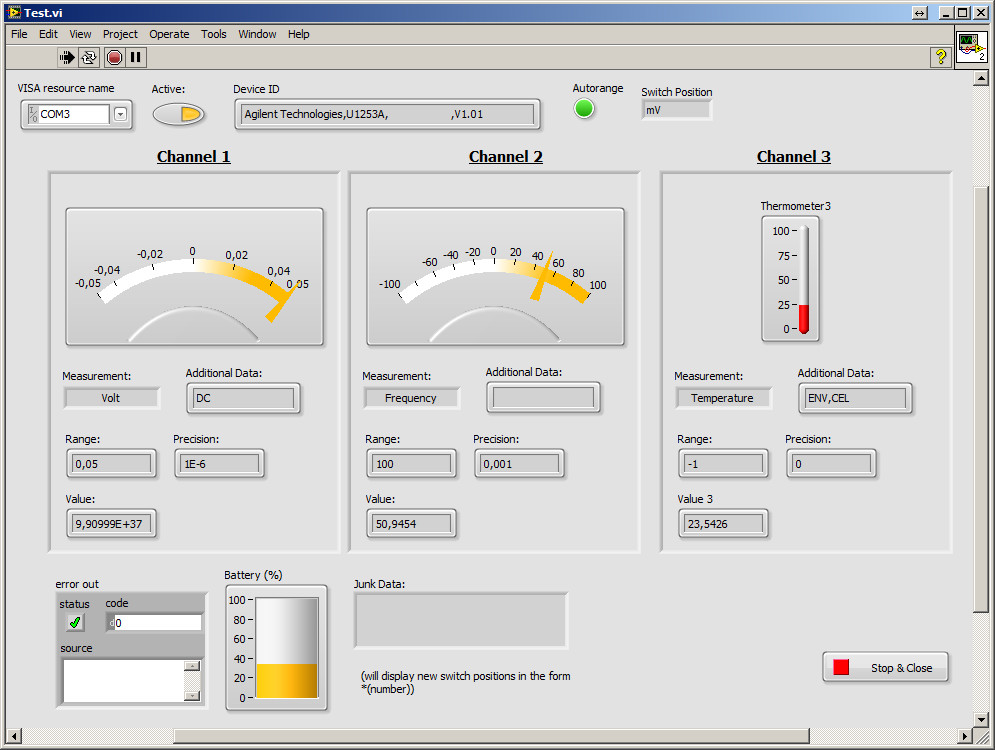
    Screenshot of a sample program
    A sample program constantly reading the meter’s data

    In short, the Device features 2.5 “channels”, or let’s call them data-streams; it is capable of e.g. measuring voltage and frequency of an AC source simultaneously and can additionally report the current ambient temperature; although that feature might not be of so much use. In principle, to continuously read out the data measured by the multimeter, you might want to query it’s current setting (unit, range, precision), it’s value or status (like auto-range, position of the rotary switch etc.).

    Command Set

    To find out how to talk to the device, and how to interpret it’s response, I used a Serial Analyzer in conjunction with the original software. The result is a LabView-Library that’s capable of handling a reasonable part of all passive commands (no controlling of the device so far only limited support for configuring the device so far) – the lib, however, should be considered in alpha-state and might still contain bugs. Every command sent from the computer should be terminated by a single linefeed (0x0A, “\n” etc.); the device itself terminates with carriage return and linefeed. On error, the device will return “*E\r\n”. Most of the time, the meter acts as passive command-responder, except when the user turns the rotary-switch – in that case, the device sends the switch position counting from 0 (and excluding the “off” state – which means you won’t be able to detect a “switch-off” event except with a communication timeout) preceded by a star, i.e. “*1\r\n” for Volt.

    The commands I saw on the line include:

    CommandMeaning
    *CLSallways sent to the device on the beginning of a command set. Probably resets the last read-command
    *RSTsaid to reset the meter, up to now I didn’t see any actual change in behavior
    *IDN?Request identification of the meter. Result is a string devided into 4 parts by commas, i.e.
    “Agilent Technologies,U1253A,MY12345678,V1.01”, reading the company’s name, the model- and serial number and it’s firmware version
    STAT?Returns the current device status. I could only identify two parameters so far.

    Sample:
    “000000I00012L00204001”
    (Character 17, 2 in this case, indicates the current position of the rotary switch, whereas the last digit is set to 1 when AUTO-range is enabled)
    CONF? (or)
    CONF? @#
    Request the current configuration (for channel @#) of the meter, see the next section
    FETC? (or)
    FETC? @#
    “Fetch” either the 1st display/stream/channel (or however you’d like to call it) or request a specific one (i.e. “FETC? @2” for the auxiliary reading, i.e. the frequency of an A/C voltage)

    The meter always returns a single floating point number.
    READ?Return the current meter reading, only applies to the 1st channel/stream/dataset…
    SYST:BATT?Get the meter’s battery status, returns a single floating point value in %/fully charged.

    Read configuration options

    Following a “CONF?”, the device answers with it’s current setting (i.e. voltage or frequency) and a few parameters. To request the configuration of a specific “channel”, send “CONF? @#” replacing the # with a number from 0 to 2. The type of voltage or current, or any subtype of measurement is appended to the basic setting with a semicolon. Additional parameters are separated from this basic information with a space, again separated by commas. Example: “VOLT:ACDC +1.00000000E+00,+1.00000000E-04” denotes an AC/DC voltage-measurement with a range of 1 Volt an a maximum resolution of 0.1 mV. The following table will give some more detailed information:

    OptionMeaning
    VOLT(:type)The channel will return a voltage. When configured for DC voltage, it’s just “VOLT”. For AC, AC/DC or DB(V/M) measurements, the corresponding option follows with a semicolon, i.e. “VOLT:ACDC”.

    Additional parameters are the measurement rage in Volts and the value for the last (4th) digit (i.e. the precision). These parameters will not be returned for dBV or dBM measurements.
    CURR(:type)Current measurement. Again, DC is the default without a semicolon, AC and ACDC are reported seperately.

    For the mA/A measurement range, there’s an additional measurement mode displaying the current as a percentage between 0 mA/4 mA and 20 mA, the corresponding return value is “CPER:4-20mA” or “CPER:40-20mA”.

    Parameters are range and precision.
    RESResistance, parameters are again range and precision.
    CONDConductance measurement, parameters are range and precision.
    DIODDiode measurement, this setting doesn’t seem to return any range or precision.
    CAPCapacitance, parameters as for VOLT or CURR.
    CPER:(range)“Percentage Scale”. Probably made for adjustment measurements, displays a percentage of the measured current in the range of [4..20] mA or [0..20] mA. The range is given after the semicolon, i.e. “CPER:4-20mA”. Additional parameters like for CURR.
    FREQFrequency in Hz, parameters are again range and precision. So far only seen for the second channel.
    PRESThe value of the frequency counter (channel 1). Does not return any reasonable range, only one parameter: 1 for direct counting, and 100 for a prescaler (divider) or 100.
    PULS:(type)Pulse-Width measurement. Might return either a percentage of high-value to low-value (“PULS:POUT”) or the pulse width directly (“PULS:PWID”). Ranges will show the values of the voltage measurement.
    TEMP:(type) (unit)Temperature measurement, the only supported setting for the third channel.

    Type might be either “K” or “J”, depending on the configured type of the thermocouple – or “ENV” denoting the meter’s environment measurement (channel 3).

    The only parameter is the unit, either “CEL” for Celsius or “FAR” for Fahrenheit.
    CONTContinuity measurement, similar to RES but with (if configured) audible tone on contact
    *EError, i.e. an unused channel.

    Send configuration

    Different “layers” of functionality for specific switch-positions can also be selected via Software. The device accepts two lines of configuration options after a “CLS*” command (I didn’t test it without), the possible options depend on the position of the rotary switch. An erroneous command will be acknowledged by “*E”, the configuration, however, might still be partially applied and might lead to instable operation (i.e. incomplete or overlapping data on the display). Success in changing the configuration will not trigger any response. Note that, upon selecting additional (calculated) quantities, those might become the primary reading; selecting AC-Voltage and Frequency for example will change the first channel to frequency, and reports the voltage on the second channel.

    Each switch position allows a different set of options, as can be seen in the following table:

    Rotary SwitchCommandMeaning
    0 (V/AC)
    1 (Volt)
    2 (mVolt)
    CONF:VOLT{:AC,:DC,:ACDC} (range)Change the range of the AC voltage measured, possible parameters are 5, 50, 500 and 1000 (Volt each) or 0.1, 0.5 and 1 (also Volt, valid for position 2). Omit the range parameter to enable auto-range.

    Parameters AC, DC and ACDC are only valid for switch-positions 1 and 2.
    CONF:FREQMeasure the frequency additionally to the voltage, it will become the primary reading. Auto-range only.
    CONF:PULS:(type)Measure pulse-width (primary). Possible types are PDUT/NDUT (positive/negative edged dutycycle in %) or PWID/NWID (positive/negative edged step-width in ms)
    CALC:FUNC {DBV,DBM}Set the primary channel to read calculated dB/V or dB/M values
    3 (Resistance)CONF:RES (range)Configure the resistance measurement; ranges are none (auto), 500, 5k, 50k, 500k, 5M, 50M or 500M (Ohms each of course).
    CONF:CONDMeasure conductance, only one range is supported and may not be configured (500 nS)
    CONF:CONT (range)Measure continuity; accepts the same ranges like CONF:RES
    4 (Diode)CONF:DIODStandard, set to Diode-measurement. Range is fixed to 2.1 V
    CONF:FCOU (range)Select the frequency counter function. Range is either 1 for direct counting, or 100 to select a prescaler of 1/100 to measure frequencies of up to 20 MHz
    5 (Capacitance)CONF:CAP (range)Set the range of the capacitance measurement, either none (Auto) or 10n, 100n, 1000n, 10u, 100u, 1000u, 10m or 100m (Farad each).
    CONF:TEMP (type),(unit)Switch to temperature measurement. Type is either K or J for {K/J}-Type thermocouples. Unit is either FAR-enheit or CEL-sius.
    SYST:TCOM (0, 1)Enable / Disable 0° compensation
    6 (µA)
    7 (mA/A)
    CONF:CURR{:AC,:DC,:ACDC} (range)Set the current measurement to DC, AC or AC/DC measurement and configure the range to autorange (none) or 500u, 5000u (µA) for position 6 (µA) or 0.05, 0.5 (A) for Position 7.
    CONF:CURR:PERCDisplay the measured current as a percentage – no direct range parameter!
    SYST:CPER (range)Configure the range of the Percentage Scale measurement – either “0-20” or “4-20” (mA each).
    for Additional parameters see Positions 0 to 2!
    (possibly) AllSYST:TENV (0, 1)Enable / Disable measurement of the environment temperature, will be readable on channel 3

    A few VIs exist already to configure the device using the above commands.

    Update: Configure PWM Output

    The last available switch-position (#8) will allow you to operate a PWM output with 3 Volts/peak and an instrumental precicion of 1/256 of the frequency set. The device features three commands to program the PWM output. “CQU:FREQ X” sets the output frequency to X, possible options can be taken from the manual and range from 0.5 Hz to 4.8 kHz. The pulse width can be controlled from 0.39 % to 99.609 % / total, given in values from 1 to 255. The device has two commands to set the pulse width, “CQU:PWID X” will program the pulse width and display the value in ms, where as “CQU:DCYC X” will display the duty cycle in %.

    Code

    The code including the sample program can be found on bitbucket.

  • Dropbox on non-supported Linux

    When installing Dropbox in a non-supported distro like Mageia, you’l soon encounter the problem, that starting Dropbox upon login to the UI (in this case: KDE) is not that easy.

    Once you downloaded the Dropbox-Distribution and installed it as described here, you should also download the CLI-script provided by Dropbox from here. After this, you can use the following script to automatically start Dropbox after login with KDE; is should be in the same directory as the CLI-Script.

    #!/bin/bash
    
    DIR="$( cd "$( dirname "${BASH_SOURCE[0]}" )" && pwd )"
    if [[ -z "$DROPBOXPY" ]]; then
      DROPBOXPY="$DIR/dropbox.py"
    else
      echo "Using preconfigured dropbox.py from $DROPBOXPY."
    fi
    
    if [ -f $DROPBOXPY ]; then
      echo "Found $DROPBOXPY. Check if the daemon is running..."
      eval "$DROPBOXPY running"
      RUNNING=$?
      if [ $RUNNING -eq 0 ]; then
        echo "Nope. Start it..."
        eval "$DROPBOXPY start"
      else
        echo "Yes, nothing to do."
      fi
    else
      echo "Cannot find / load dropbox.py."
    fi

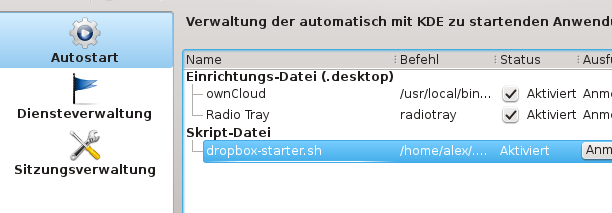
    This script does not take any arguments by default, but simply asks the Dropbox’ CLI-Script to start the daemon; hence can be run by KDE’s Autostart-System:

    Picture of Dropbox configured for autostart with KDE

    edit: if dropbox.py results in the error

    Traceback (most recent call last):
      File "/home/alex/.dropbox-dist/dropbox.py", line 25, in <module>
        import locale
      File "/usr/lib64/python2.7/locale.py", line 18, in <module>
        import operator
    ImportError: /home/alex/.dropbox-dist/operator.so: undefined symbol: _PyUnicodeUCS2_AsDefaultEncodedString

    you might place both dropbox.py and the starter-script into a different folder than the one created by the Dropbox-installer (which is ~/.dropbox-dist). E.g. use ~/.dropbox for both files, this should do the trick. Dropbox itself uses a custom build of Python, with some not-so-compatible libraries coming along.

    Now, once we have installed Dropbox, we might want Dolphin to show the status of files and folders in our Dropbox. Well, there’s a Plugin available for download in Dolphin’s settings that adds some Dropbox-specific menu entries to the context menu, but it doesn’t provide icon overlays. Another plugin written by Thomas Richard, however not available via the wizard, does.

    You can download, compile and install the plugin with the following commands (you need CMake installed for this):

    git clone git://anongit.kde.org/scratch/trichard/dolphin-box-plugin.git
    cd dolphin-box-plugin/
    cmake . -DCMAKE_INSTALL_PREFIX=`kde4-config --prefix`
    su -c 'make install'

    The kde4-config-Part was taken from a commend at the Plugin’s “Homepage” and ensures that the plugin get’s installed into the right directory. After installing, you have to restart dolphin; after that, you get some pretty cool icons floating above the file and folder icons in your Dolphin indicating the sync-status of your files!

  • LabView 2012 in Mageia 3

    So, nachdem nun LabVewi 6.1 auf SL6 gut läuft, sollte auch 2012 auf meinem aktuellen “Arbeitstier” funktionieren. Mageia basiert auf Mandriva, und ist damit ebenfalls RPM-basiert.

    Nach dem man die LabView 2012-Setup im Linux-Unterordner auf der in HFS+ formatierten Mac/Linux-DVD der Academic Site License extrahiert hat, lässt sich Labview selbst nach Auflösung einiger Abhändigkeiten problemlos installieren. Insbesondere

    libXinerama kernel-desktop-devel-latest

    und Abhängigkeiten müssen auch als 32-Bit Binary vorliegen, wenn LabView auf einem 64-Bit System gestartet wird.

    Nach der installation von Labivew wird nach NI-VISA gefragt. Wer lediglich etwas Programmierung üben möchte, kann sich die VISA-Libs sparen. Für die Gerätesteuerung aber sind sie zwingend notwendig; die Installation schlägt auf den ersten Anlauf aber fehl:

    ******************************** ERROR ****************************************
    * The version of gcc in the path does not match the version of gcc used to    *
    * compile the currently running kernel.  This can cause unpredictable         *
    * behavior in kernel drivers and should be fixed.                             *
    * gcc version: gcc-Version 4.7.2 (GCC)                                        *
    * kernel compiled with: 4.7.2                                                 *
    ******************************** ERROR ****************************************

    Scheinbar unterscheiden sich die in openSUSE, RHEL und SL verwendet Art und Weise, die GCC-Version im Kernel zu hinterlegen derart von der in Mageia verwendeten, dass der Installer trotz vermeidlich gleicher Kernel-Version fehlschlägt.

    Ganz unpraktisch ist das aber nicht, denn vor der Installation der NI-VISA-Treiber muss die (zumindest auf der 2012er) DVD mitgelieferte Version von NI-KAL auf Version 2.4 aktualisiert werden, um mit neueren Kernel-Versionen kompatibel zu sein (siehe Forums-Post der LabView community). Der Download auf ni.com ist ein ISO-Image, das zunächst entpackt werden will.

    [user@localhost NIKAL24_new]# ls -Gahl
    insgesamt 1,7M
    dr-xr-xr-x  2 user 4,0K Okt 28 15:11 ./
    drwxrwxr-x 10 user 4,0K Okt 30 08:51 ../
    -r-xr-xr-x  1 user  54K Okt 28 15:09 INSTALL*
    -r--r--r--  1 user  23K Okt 28 15:05 LICENSE.txt
    -r--r--r--  1 user 1,5M Okt 28 15:06 nikal-2.4.0f5.tar.gz
    -r--r--r--  1 user  20K Okt 28 15:05 PATENTS.txt
    -r--r--r--  1 user 7,3K Okt 28 15:05 README.txt
    -r-xr-xr-x  1 user  13K Okt 28 15:05 UNINSTALL

    In nikal-2.4.0f5.tar.gz befindet sich das corpus delicti, im Unterordner bin: installerUtility.sh ab Zeile 343:

       # check the version of gcc that is in the path and ensure that it is the
       # same version of gcc that was used to compile the currently running kernel
       if [ -z "$KERNELTARGET" -o "$KERNELTARGET" == "`$UNAME -r`" ]; then
          currentGCCVersion=`$CC -v 2>&1 | tail -n 1 | $SED 's/.*gcc[a-zA-Z (]\+\([0-9][^ )]\+\).*/\1/'`
          kernelGCCVersion=`$CAT /proc/version | $SED 's/.*gcc[a-zA-Z (]\+\([0-9][^ )]\+\).*/\1/'`
          if [ "$currentGCCVersion" != "$kernelGCCVersion" ]; then
             if [ "${currentGCCVersion%\.*}" != "${kernelGCCVersion%\.*}" ]; then
                echo "******************************** ERROR ****************************************"
                echo "* The version of gcc in the path does not match the version of gcc used to    *"
                echo "* compile the currently running kernel.  This can cause unpredictable         *"
                echo "* behavior in kernel drivers and should be fixed.                             *"
                echo "* gcc version: $currentGCCVersion                                                          *"
                echo "* kernel compiled with: $kernelGCCVersion                                                 *"
                echo "******************************** ERROR ****************************************"
                return $statusFail
             else
                echo "******************************** WARNING **************************************"
                echo "* The version of gcc in the path does not match the version of gcc used to    *"
                echo "* compile the currently running kernel.  This can cause unpredictable         *"
                echo "* behavior in kernel drivers and should be fixed.                             *"
                echo "* gcc version: $currentGCCVersion                                                          *"
                echo "* kernel compiled with: $kernelGCCVersion                                                 *"
                echo "******************************** WARNING **************************************"
             fi
          fi
       fi

    Man können nun die Funktion beider RegEx-Komandos analysieren, oder den relevanten Teil einfach entfernen. Das Archiv wieder packen, und die Installation starten.

    Danach kommen die NI-VISA Treiber, die allerdings verwenden nicht nur die installerUtility.sh in ihrem eigenen Archiv, sondern auch eine Kopie davon in

    /usr/local/natinst/nikal/bin/installerUtility.sh

    Diese darf dann ebenfalls angepasst werden, danach klappt auch die Installation von NI-VISA.

  • Labview 6.1 auf Scientific Linux 6

    Die c’t hat in der Ausgabe 11/2007 Labview 6.1 zur Verfügung gestellt. Die Windows-Version gibt es auf der Heft-CD, Versionen für Linux und Mac (PowerPC) gibt es auf dem FTP-Server von Heise.

    Labview wird für Linux grundsätzlich nur für RPM-Basierte Distributionen angeboten. Die Installation auf Debian-System gelingt ebenfalls, VISA und IVI Treiber laufen allerdings meist nicht. Auf Scientifc 6 geht die installation aber ganz leicht, x64-Systeme benötigen allerdings zuvor einige x86-libs:

    yum install glibc-devel.i686 libX11-devel.i686 libXext-devel.i686

    Danach muss der Verzeichnis-Index abgeschaltet werden (siehe NI-KB-Eintrag zu dem Thema)

    su -c 'tune2fs -O ^dir_index /dev/sdX'

    Dies ist erst ab Version 7.1.1 nicht mehr nötig – falls der index nicht abgeschalten wird, crasht LabView mit folgender Meldung:

    Failure : "filemgr.cpp", line 4145
    LabVIEW version 6.1
    For assistance in resolving this problem, please record the preceding information and navigate to www.ni.com/failure, or contact National Instruments.
    Abgebrochen


  • Server 2012 und Remotedesktopdienste – Umbenennen

    Nur falls mal jemand vor einem ähnlichen Problem stehen sollte: Wer einen Terminal-Server 2012 umbenennen will, steht vor dem Problem, dass nach dem Umbenennen der Servermanager seinen Dienst verweitert. Im fehlt der alte Servername im Serverpool, der immer noch in der Bereitstellung registriert ist.

    Die zugehörige Meldung:

    Die folgenden Server in der Bereitstellung sind nicht Teil des Computerpools: <servername>.
    Die Server müssen dem Computerpool hinzugefügt werden.

    Das ist natürlich rechter Blödsinn aus unserer Sicht, schließlich will man ja einen neuen Servernamen verwenden. Auch eine “Neuinstallation” der Remotedesktopdienste mit dem Servermanager schlägt fehl, als möglicher Verbindungsbroker taucht nur der alte Server auf.

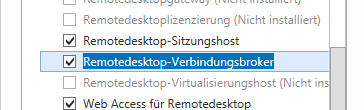
    Abhilfe schafft nur, den Broker-Rollendienst händisch zu entfernen und neu hinzuzufügen. Dann kommt folgende Meldung im Servermanager:

    Es ist keine Remotedesktopdienste-Bereitstellung im Serverpool vorhanden. Führen Sie zum erstellen einer Vereitstellung den Assistenten […] aus.

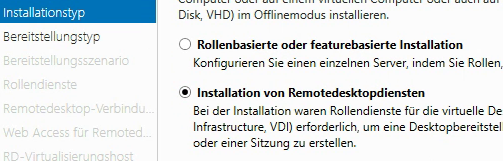
    Gut. Also jetzt wieder den Assistenten zur Installation der Remotedesktopdienste starten, alles aus dem Verbindungsbroker steht bereits richtig konfiguriert da. Jetzt lässt sich auch der neue Servername als zuständiger Verbindungsbroker auswählen – Problem gelöst: